FABLAB BAHRAIN SPARKLE V1.0 ✨ - Your ESP32C3 Prototyping Powerhouse! 🚀
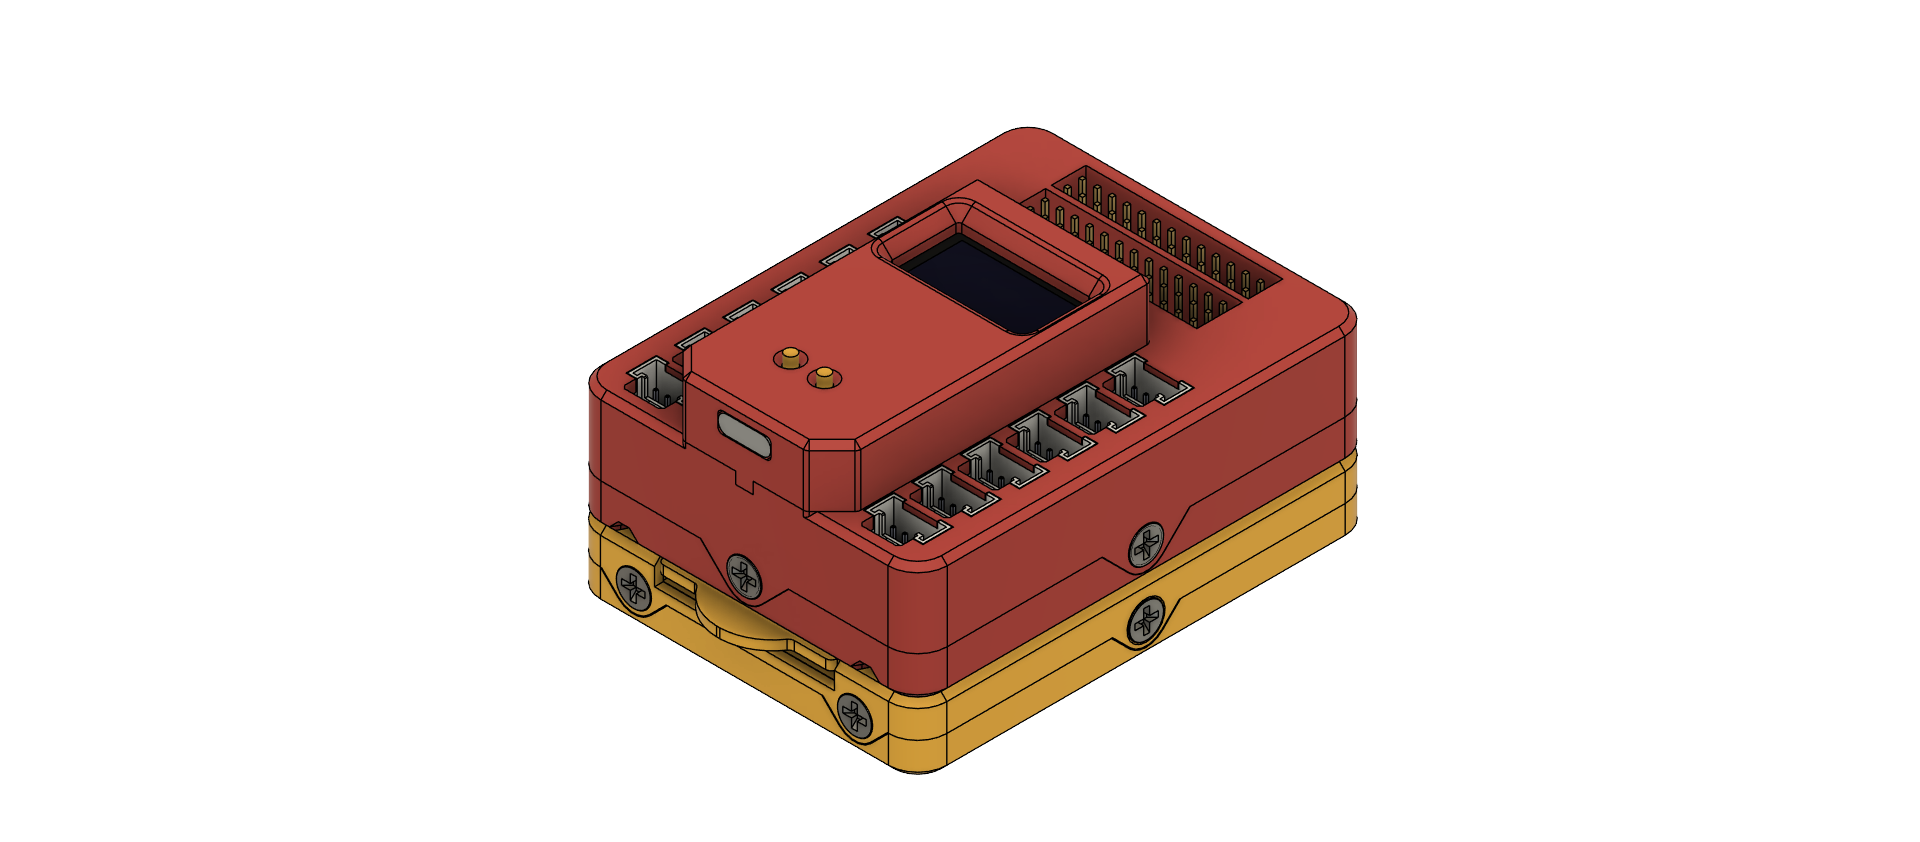
 Tiired of messy wires and breadboard struggles? 🤯 Sparkle v1.0 is here to rescue your electronics projects! 🦸♀️ This ESP32-C3 based development board was born from a frustration with tangled wiring, the need for external power, and the limitations of breadboards, often leading to unreliable projects due to loose connections and difficulty in debugging. It's designed to be a standalone powerhouse, but its true potential unlocks with attachable modules! 🛠️
Need to make it a remote device for sensors, telemetry, actuators, a moving vehicle, or a drone? 🚗💨 We've got you covered! Our battery module offers convenient battery attacment for remote devices, with built-in charging and management, plus a booster from +3.7V to +9V. 🔋 And it doesn't stop there – the battery module also integrates an IMU (MPU6050) with accelerometer, magnetometer, and gyroscope!
Proudlly developed by FABLAB BAHRAIN, with a huge thanks to Fab Engineer/Trainer Ghassan Yusuf! 🛠️
Tiired of messy wires and breadboard struggles? 🤯 Sparkle v1.0 is here to rescue your electronics projects! 🦸♀️ This ESP32-C3 based development board was born from a frustration with tangled wiring, the need for external power, and the limitations of breadboards, often leading to unreliable projects due to loose connections and difficulty in debugging. It's designed to be a standalone powerhouse, but its true potential unlocks with attachable modules! 🛠️
Need to make it a remote device for sensors, telemetry, actuators, a moving vehicle, or a drone? 🚗💨 We've got you covered! Our battery module offers convenient battery attacment for remote devices, with built-in charging and management, plus a booster from +3.7V to +9V. 🔋 And it doesn't stop there – the battery module also integrates an IMU (MPU6050) with accelerometer, magnetometer, and gyroscope!
Proudlly developed by FABLAB BAHRAIN, with a huge thanks to Fab Engineer/Trainer Ghassan Yusuf! 🛠️
Table of Contents 📖
Overview 🤩
Ever wrestlled with a breadboard that just won't stay connected? 😩 Breadboards are great, but their size and flimsy connections can be a recipe for frustration! 😫 A gentle bump or a stray vibration can send your project into chaos! 💥 Sparkle v1.0 is designed to ditch the breadboard blues. Its compact form factor and reliable connections mean you can focus on creating, not constantly debugging. 🎉 It was born from a need to simplify the prototyping process for students, directly tackling common frustrations like tangled wires, the search for power, and unreliable connections. Sparkle v1.0 aims to provide a cleaner, more reliable, and user-friendly prototyping platform.
Features ✨
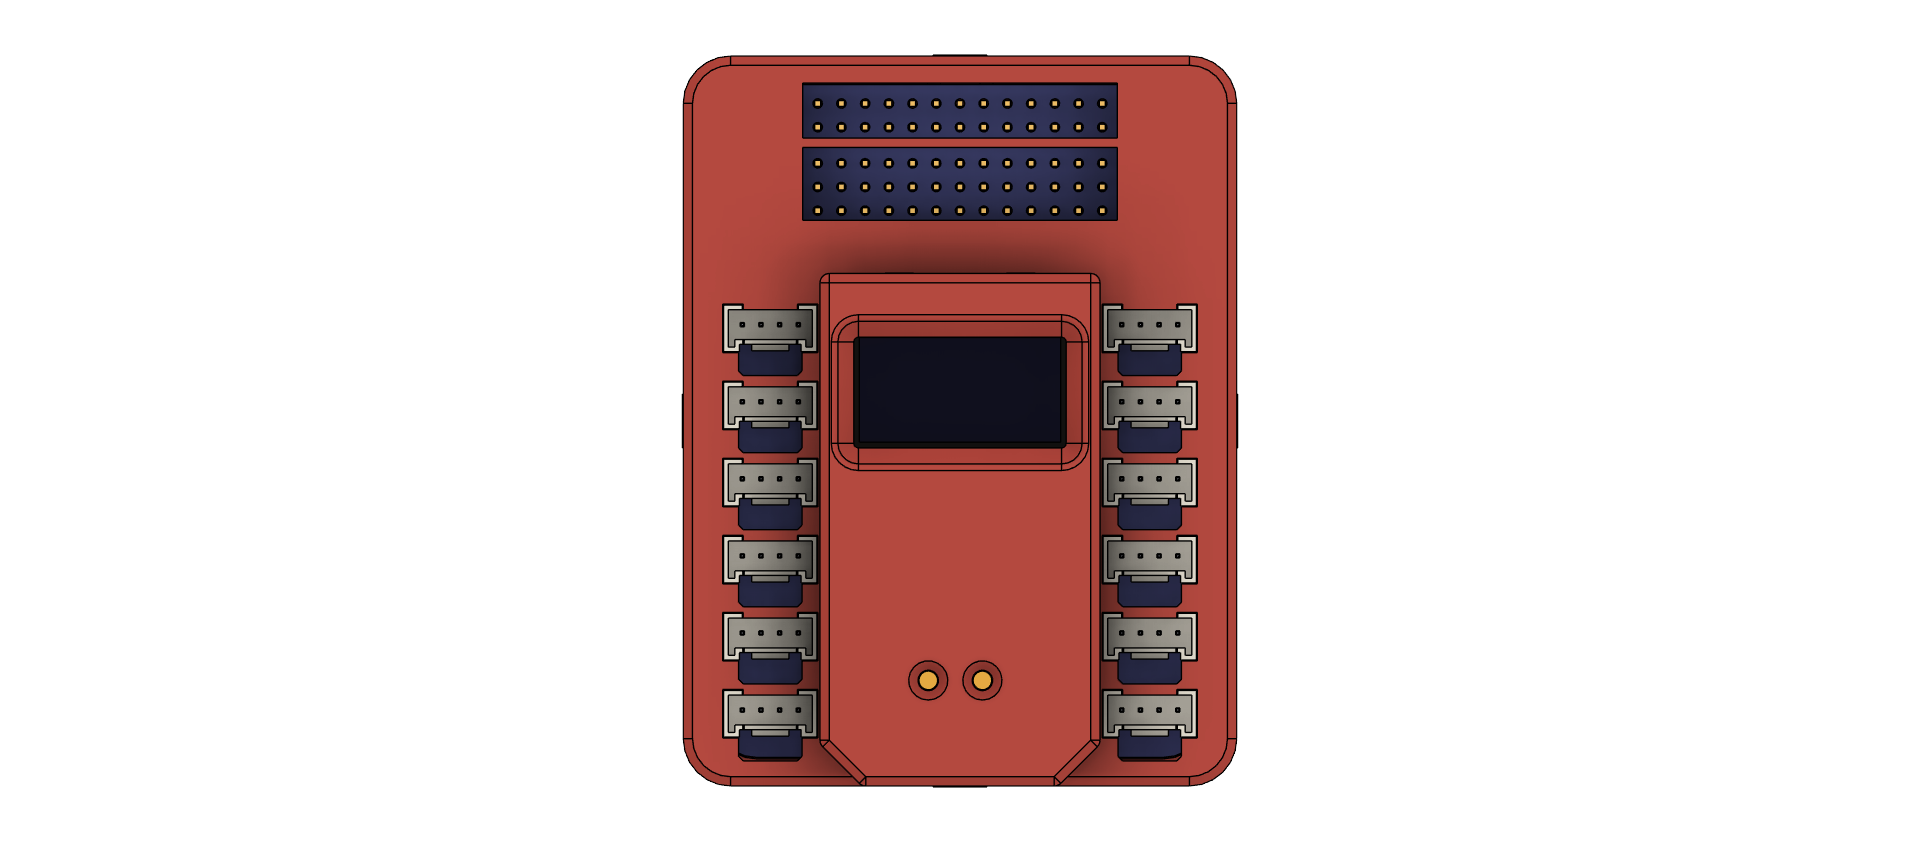
- 🧠 ESP32-C3 Microcontroller: A powerful and low-cost microcontroller with integrated Wi-Fi and Bluetooth connectivity, enabling wireless communication and IoT applications.
- 🔌 Grove Connectors (6x): Provide flexible I/O capabilities for connecting various Grove modules and sensors.
- Left Side Connectors:
- GPIO (0, 1, +3V3, GND)
- GPIO (2, 3, +3V3, GND)
- GPIO (4, 5, +3V3, GND)
- GPIO (6, 7, +3V3, GND)
- NC (10, NC, +3V3, GND)
- RXD (10, RXD, +3V3, GND)
- TXD (11, TXD, +3V3, GND)
- Right Side Connectors:
- I2C (SCL/9, SDA/8, +3V3, GND)
- Left Side Connectors:
- DuPont Male Pin Header: Offers direct access to a comprehensive set of GPIO pins and power rails, providing maximum flexibility for custom connections.
- 128x64 OLED Display: Integrated display (address: 0x3C) for visual feedback, status indication, and data visualization.
- Power Supply: The board can supply a total of 3A, with dedicated +3.3V and +5V power rails, ensuring sufficient power for most projects.
- Easy Prototyping: Designed for rapid prototyping with readily available Grove modules and the versatility of the DuPont header.
- Compact Form Factor: Small and portable, making it easy to integrate into various projects and applications.
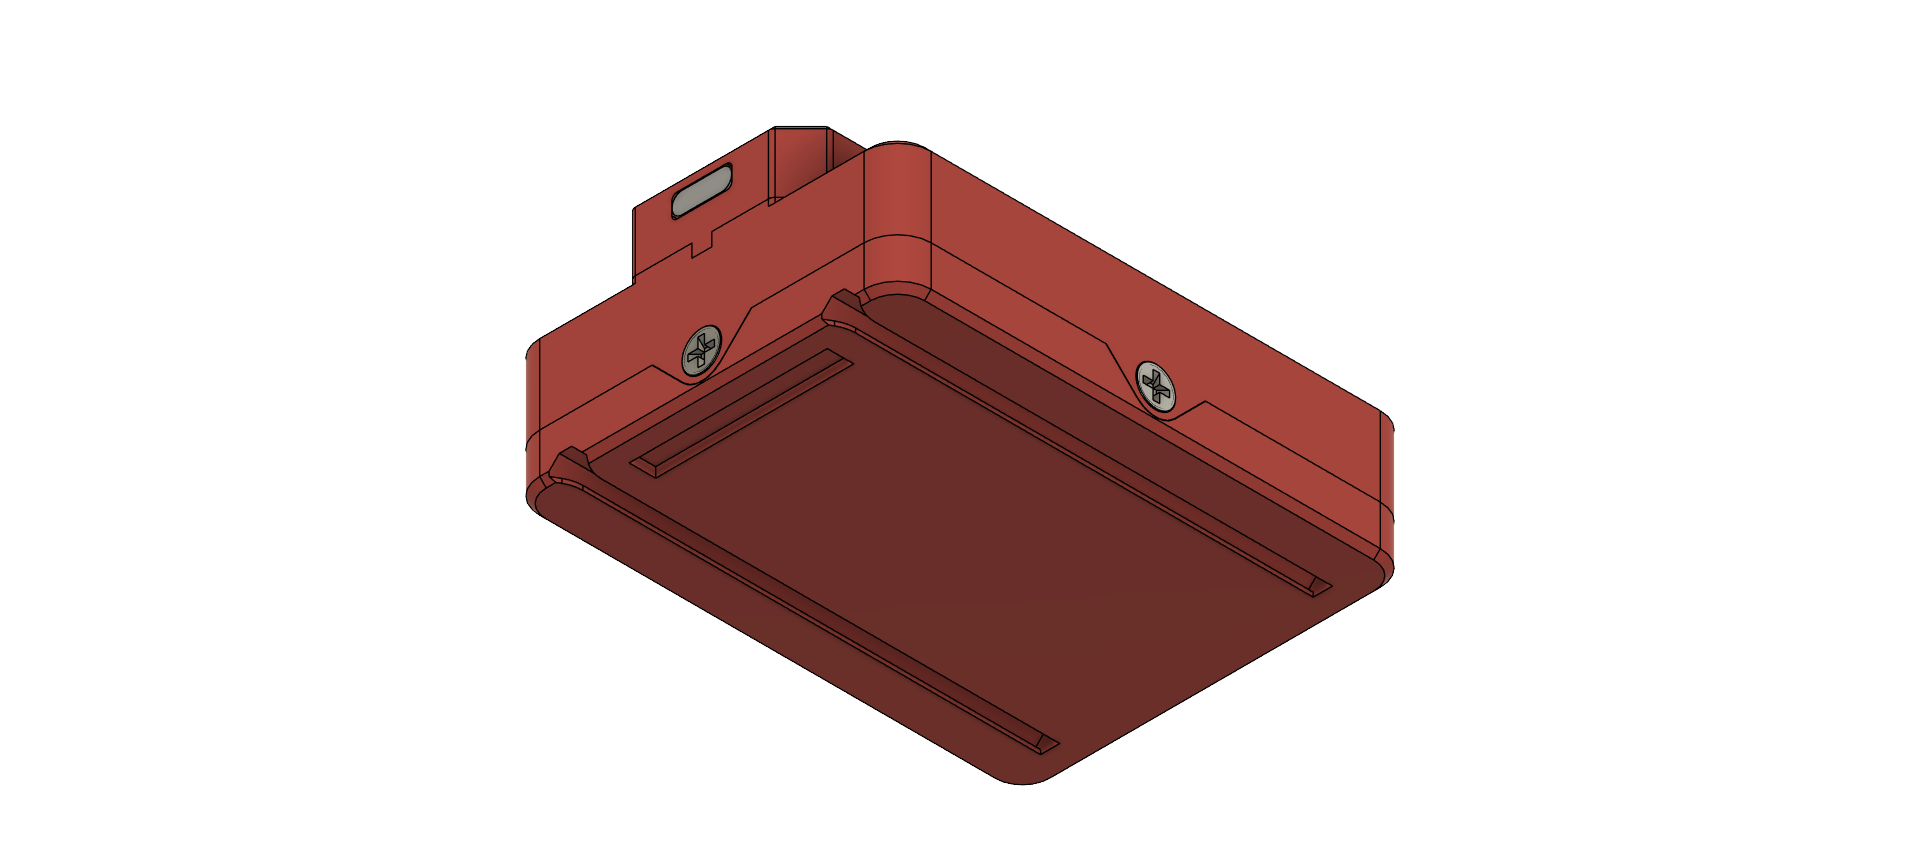
- Attachable Modules: Expand its capabilities with modules like a battery module for remote devices (sensors, telemetry, actuators, vehicles, drones).
- Battery Module: Equipped with battery charging and management, and a booster from +3.7V to +9V.
- Integrated IMU: The battery module also features a built-in IMU (MPU6050) with accelerometer, magnetometer, and gyroscope.
Getting Started 🚀
Before you begin, you'll need to install one of the following tools:
- Arduino IDE: The most popular and widely supported platform for programming ESP32 devices. Download it from https://www.arduino.cc/en/software.
- MicroBlocks: A visual block-based programming environment, ideal for beginners. Download it from https://microblocks.org/.
- MicroPython: A lean and efficient Python implementation for microcontrollers. Download it from https://micropython.org/download/.
Choose the tool that best suits your programming experience and project needs.
Installation 🛠️
- Install the chosen IDE/Platform: Follow the installation instructions on the respective websites (links above).
- Install ESP32 Board Support:
- Arduino IDE: Go to File > Preferences, and add the following board manager URL:
https://dl.espressif.com/esp/stable/tools/idf/tools/esp32-samples/esp32-core/package_esp32.json. Then, go to Tools > Board > Boards Manager... and search for "esp32" to install the ESP32 board support package. - MicroBlocks: MicroBlocks typically includes the necessary ESP32 board support.
- MicroPython: Follow the instructions on the MicroPython website for setting up the ESP32 board support.
- Arduino IDE: Go to File > Preferences, and add the following board manager URL:
- Connect the Sparkle v1.0: Use a USB cable to connect the Sparkle v1.0 board to your computer.
- Select the correct board: In your IDE/Platform, go to Tools > Board and select the appropriate ESP32 board (e.g., "ESP32C3 Dev Module" for Arduino IDE).
Battery Module Attachment 🔋
- Step 1: Align the battery module with the designated connector on the Sparkle v1.0 board.
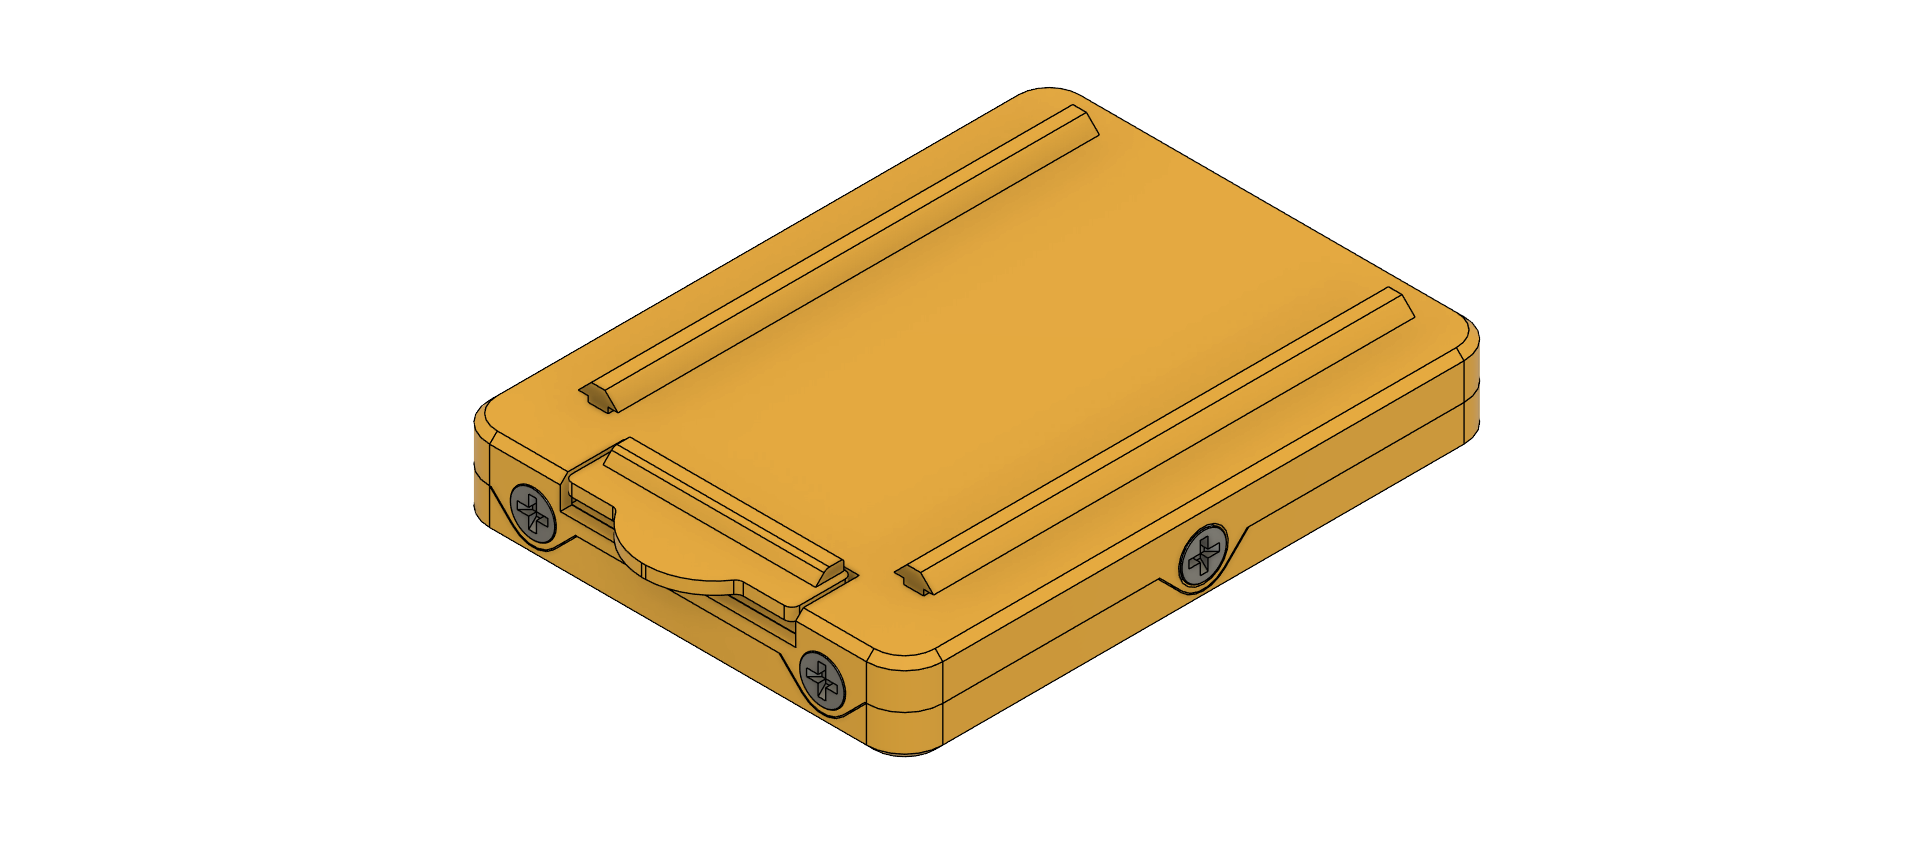
- Step 2: Gently push the battery module until it clicks into place, ensuring a secure connection.
- Step 3: Connect the battery to the module following the polarity markings (+ and -).
- Note: Ensure the battery is properly secured to prevent accidental dislodgement during operation.
License 📜
This project is licensed under the MIT License - see the LICENSE file for details.
Author 👨💻
Proudly developed by FABLAB BAHRAIN, with a huge thanks to Fab Engineer/Trainer Ghassan Yusuf!